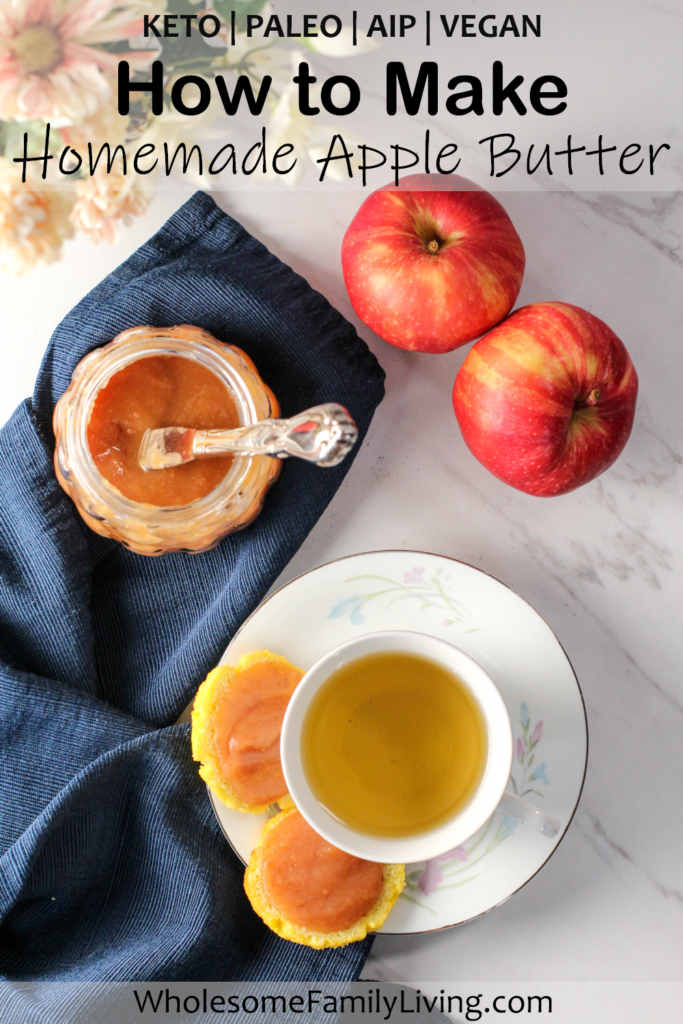
Did you know that apple butter is actually very easy to make?
You have got to try making your own delectable apple butter to enjoy this fall!
And even better is that it can be made with a variety of apple types through several different cooking methods.
In this post, I have included directions for cooking on a stove top, in a slow cooker, or in an Instant Pot.
We will also discuss how to store your apple butter through freezing or canning, since this recipe makes about 8 cups!
Now you may be wondering, what is apple butter?
For those of you that haven’t had the chance to try this delicious spread, it’s similar to applesauce, but is sweeter and uses spices to enrich the flavor.
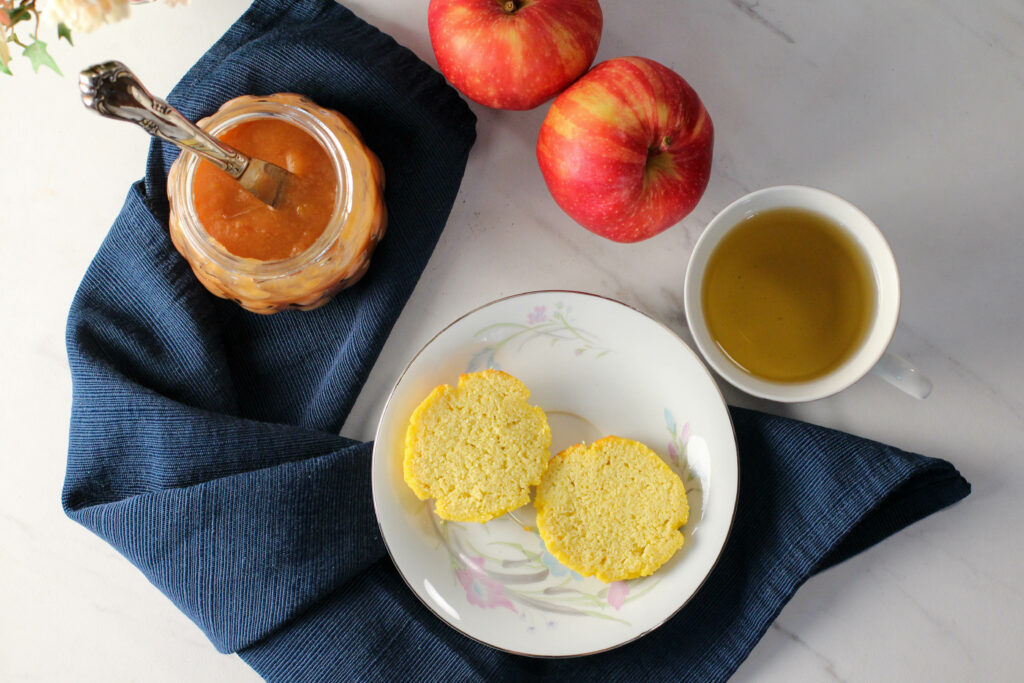
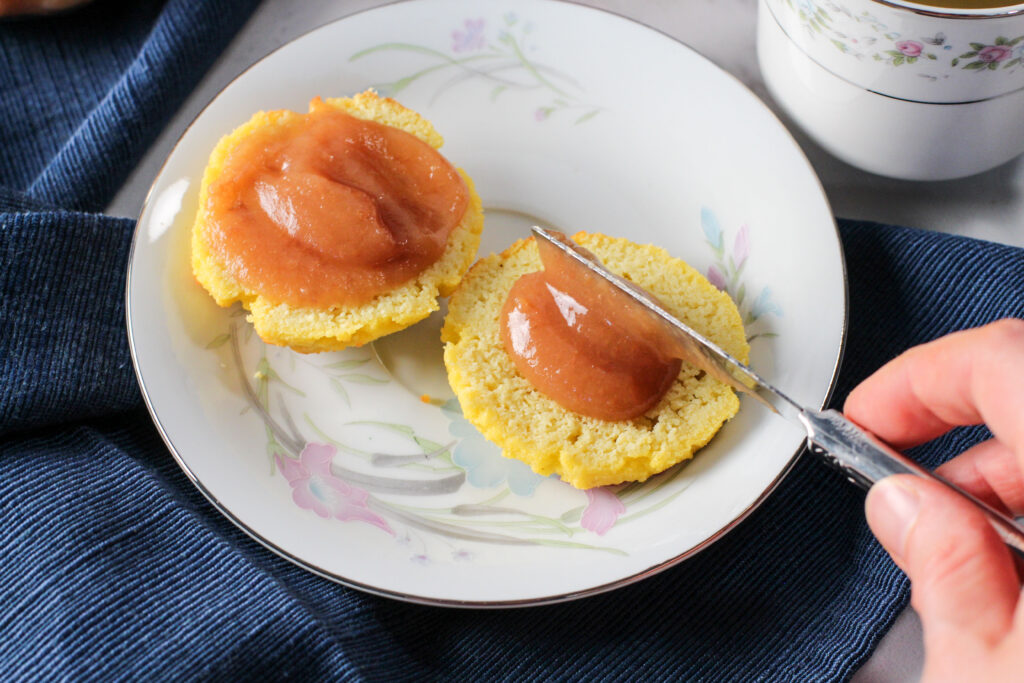
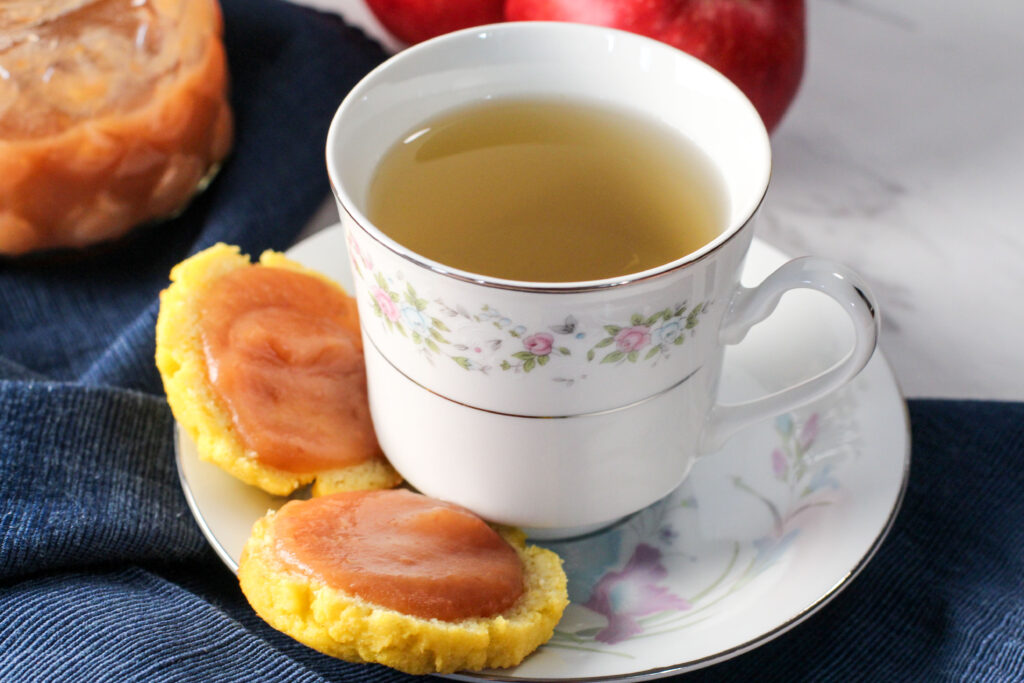
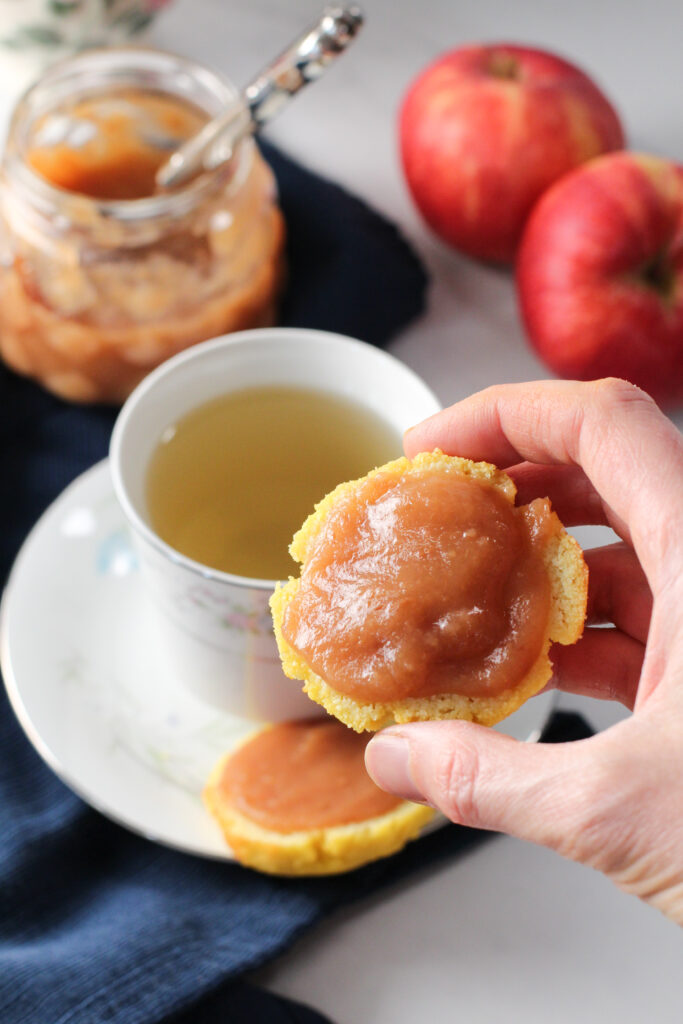
It can be enjoyed either hot or cold, and it is usually spread on biscuits, but you can enjoy it on other things as well (more ideas below)!
But trust me – this stuff is good!
My toddler ate 4 biscuit halves covered with this stuff when I first made it.
So let me share with you all of the tips you need to make yummy, homemade, sugar-free apple butter!
Which Apples Can be Used to Make Apple Butter?
The first thing you are going to need, as you might have guessed, is APPLES!
What type of apples?
Honestly, any will do!
But there are some varieties that are softer and therefore will cook down easier.
Below is a list of possible apple types to use, and these are not listed from best to worst or anything – just alphabetical.
Best Apples for Apple Butter
- Braeburn
- Courtland
- Fuji
- Gala (that’s what I used in these pictures)
- Golden Delicious
- Ida Red
- Jonathan
- McIntosh
Feel free to use all of one kind, or mix things up and use a variety of apples.
There really is no BEST apple to use, so grab something that’s on sale, or even better, an apple that you can pick at a local orchard!
You really can’t get this part wrong!
Do You have to Peel the Apples?
NO!
Now that being said, if leaving the peel on apples weirds you out, by all means, peel them!
You might also want to consider peeling the apples if you like a chunky apple butter and plan to just mash the apples with a potato masher.
In that case, the peels will not get broken up and would be rather annoying to eat.
But if you are going to puree the apples, I find it simpler and faster to leave the skin on.
An added bonus is that you get a little extra nutrition from the apple peels.
Seriously, once you puree the apples with an immersion blender or a regular blender, you will not even notice the apple peel!
Is Apple Butter Healthy?
That depends – are you making homemade apple butter with organic apples and leaving it sugar-free (like this recipe)?
Then I would argue that it is healthy and totally fine to enjoy!
However, if you are buying store-bought apple butter that is loaded with sugar, pesticides, and preservatives, then I would say no!
Even homemade apple butter that has loads of sugar in it is not good for you.
Take for example the recipe that is in my “Canning” book.
It calls for 4 pounds of apples and get this – TWO CUPS OF SUGAR.
WHOA!
I had a sugar rush just reading that!
Apples are already so sweet, they do not have to be sweetened with anything else!
That’s why additional sweetener is an OPTIONAL ingredient in this recipe.
My recommendation is to try the apple butter without sugar first and you might be surprised at how sweet it already tastes, especially if you have been eating a sugar-free diet for a while.
How to Make Homemade, Sugar-Free Apple Butter in a Crockpot
So enough talk about apple butter, how do you actually make this delicious recipe?
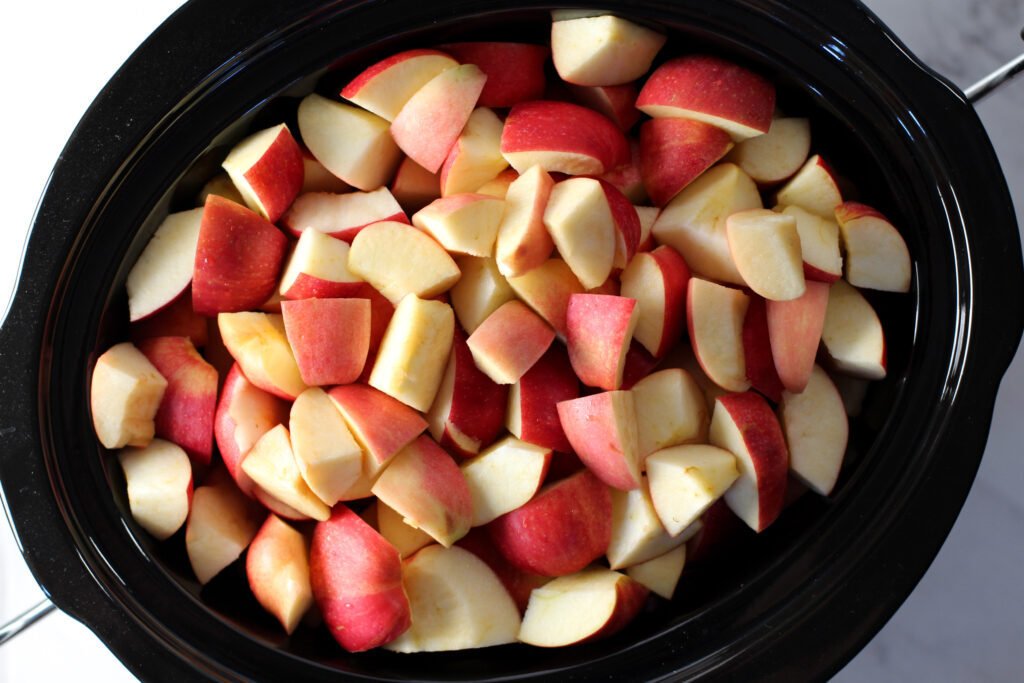
First, grab your apples and get them washed and cored (and peeled if desired – see above).
I cut mine into quarters, core them, and then cut those quarters into halves as I drop them into the crock pot.
Once all of the apples are ready, add the apple cider (you can also use apple juice or water) and the apple cider vinegar (you can also use lemon juice).
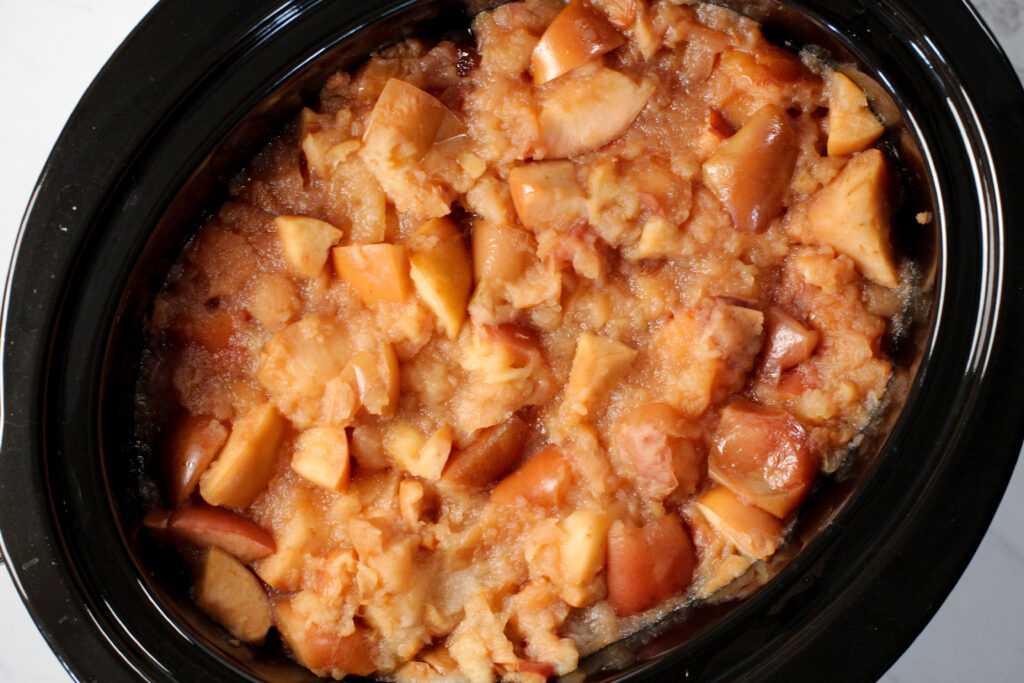
Put on the lid and set the crockpot to cook on low for 8 hours (you can keep it going for as long as 12 hours).
This is a perfect food to cook overnight while you are sleeping.
Think of the good smells you would wake up to…Mmmmmmm….
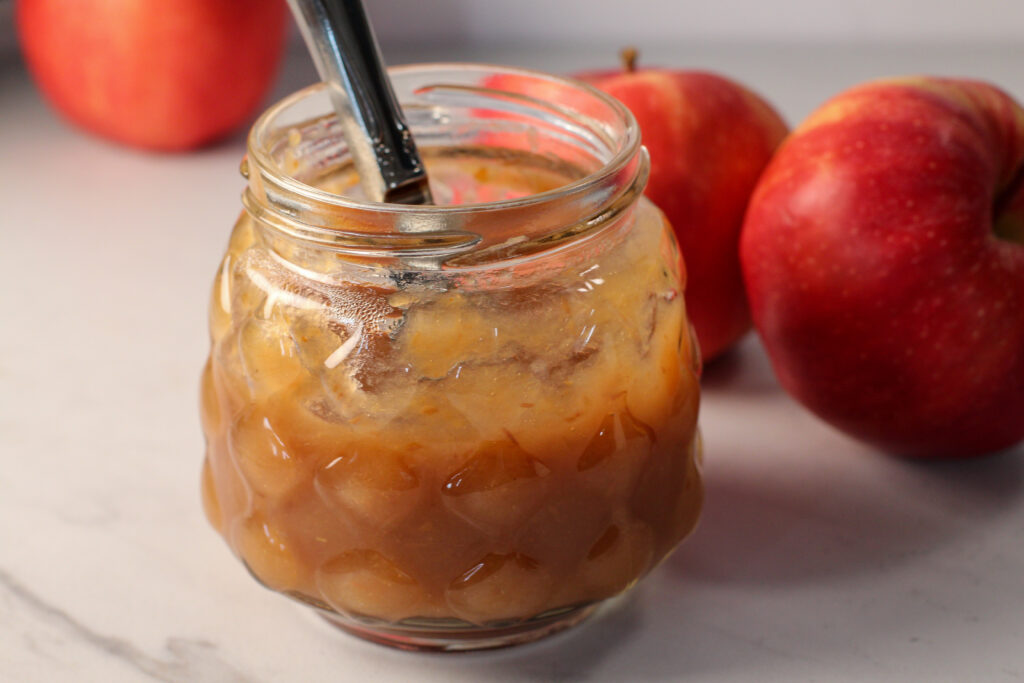
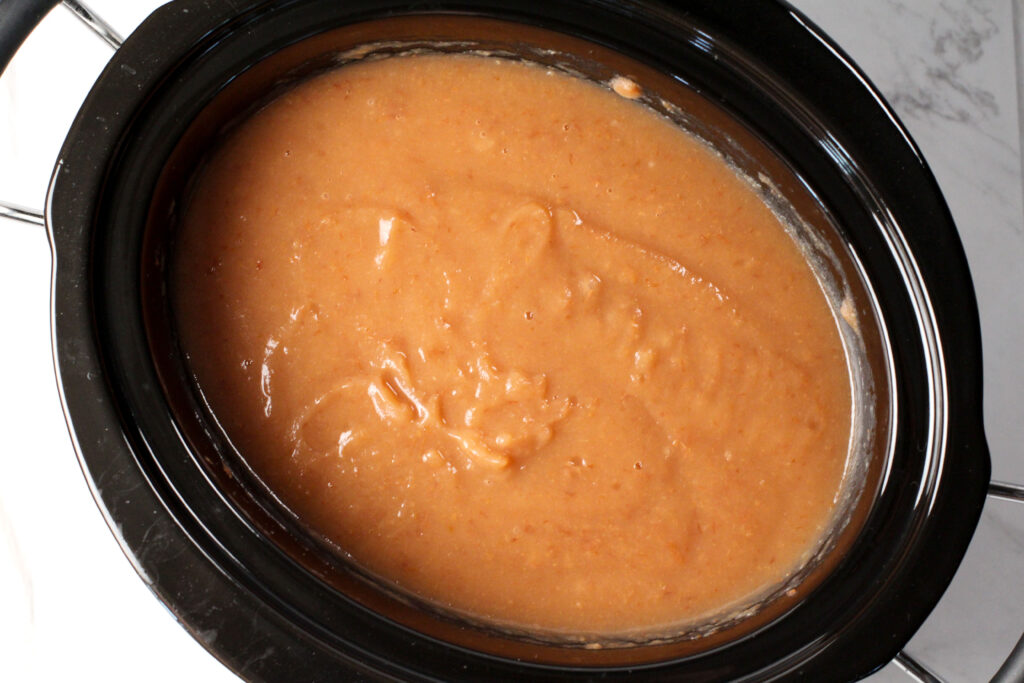
Once the apples are cooked and soft, they should look something like this after you give them a quick stir.
Now take your immersion blender and puree the apples.
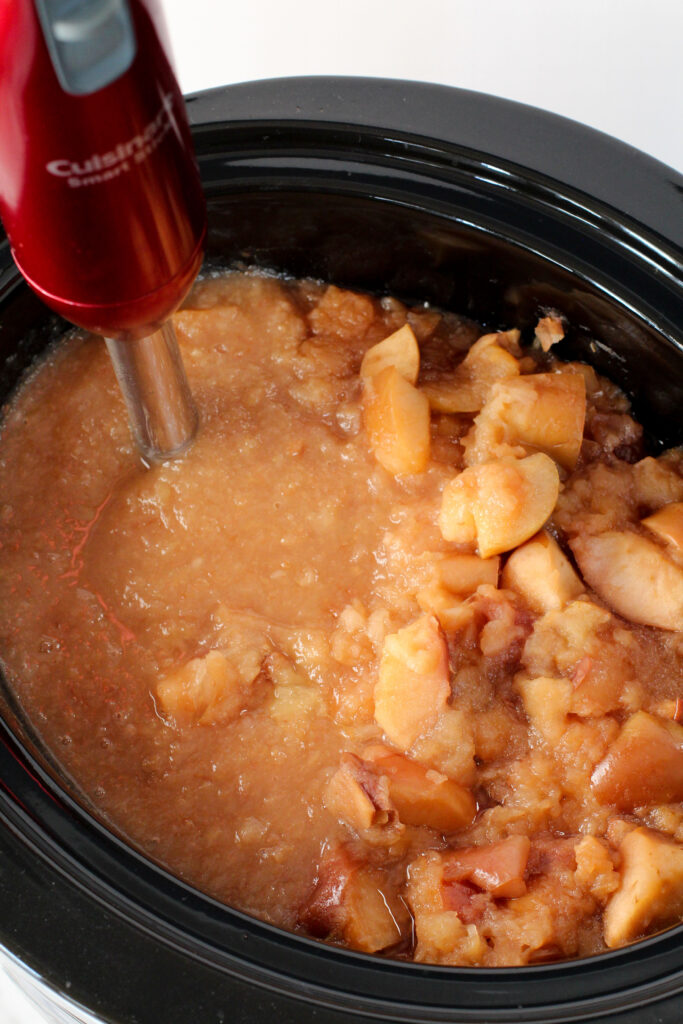
As noted above, if you would like a “chunkier” apple butter, peel the apples before coring them and use a potato masher instead of an immersion blender.
Also, if you don’t have an immersion blender, a regular blender can be used.
Once everything is blended, stir in the initial tablespoon of cinnamon.
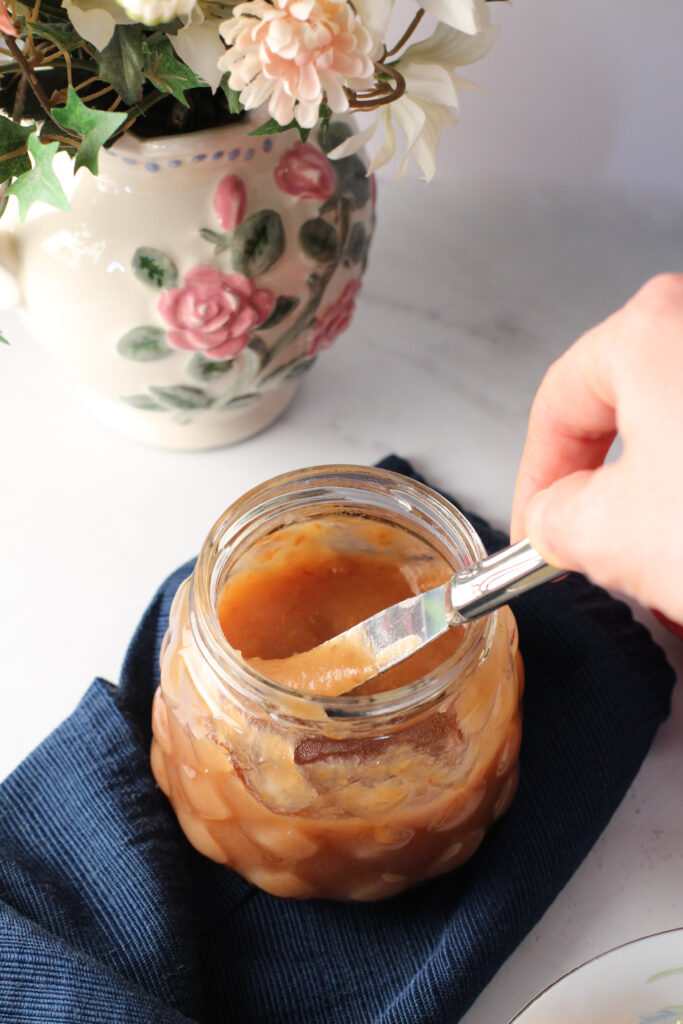
Now it’s time for a taste test!
Try it plain on a spoon or spread a little on a biscuit to see if you like the flavor.
If you would like more flavor, add another tablespoon of cinnamon.
Additionally, if you would like it to be more spiced, you could add the nutmeg or cloves.
If it doesn’t seem sweet enough for you, add in a sweetener of your choice.
You could also use Lakanto sweetener, Swerve, stevia, coconut sugar, honey, or maple syrup.
Add spices and sweetener until it is to your liking!
Enjoy!!

How to Fix Runny Apple Butter
Now let’s talk about the number one issue people have when making homemade apple butter – what to do if it’s too runny!
It takes patience, but the best thing to do is to slowly let the moisture simmer off.
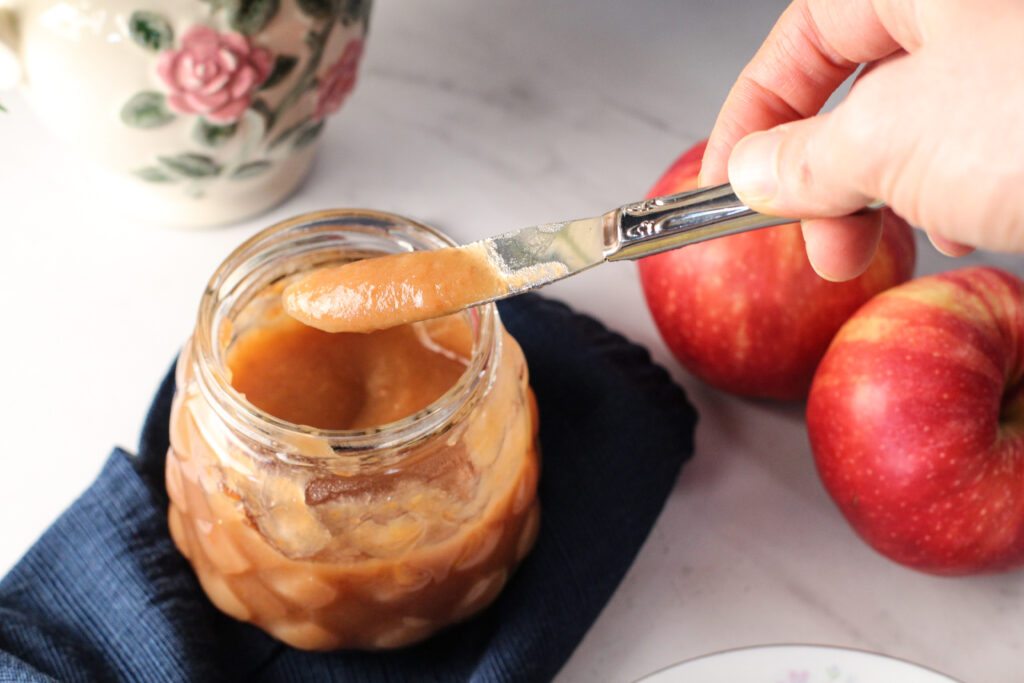
You want it to be thick enough that it stands up on a spoon.
If it runs right off the spoon, it’s a little too runny.
So the easiest way to cook off more moisture is to just keep cooking it on low in whatever you used to cook the apples.
Did you make it in your crockpot? Just put the crockpot back on low with the lid off and let it heat until it has thickened (up to 4 more hours could be needed).
If you made the apple butter on the stove, put the pot back on the burner and heat it over low heat.
If you used your Instant Pot, try using the sauté feature to continue cooking off moisture.
You will just want to make sure that you are stirring the apple butter to make sure it’s not burning to the bottom.
When apple butter starts to get thick, it tends to burn instead of boil, so keep an eye on it!
Stirring will help release moisture as well!
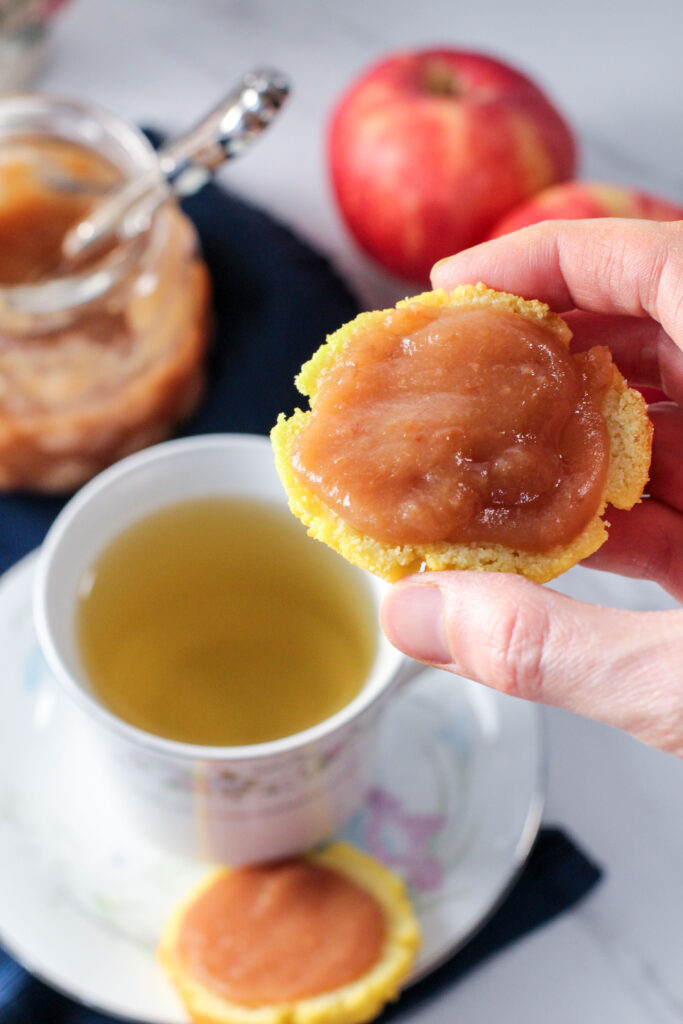
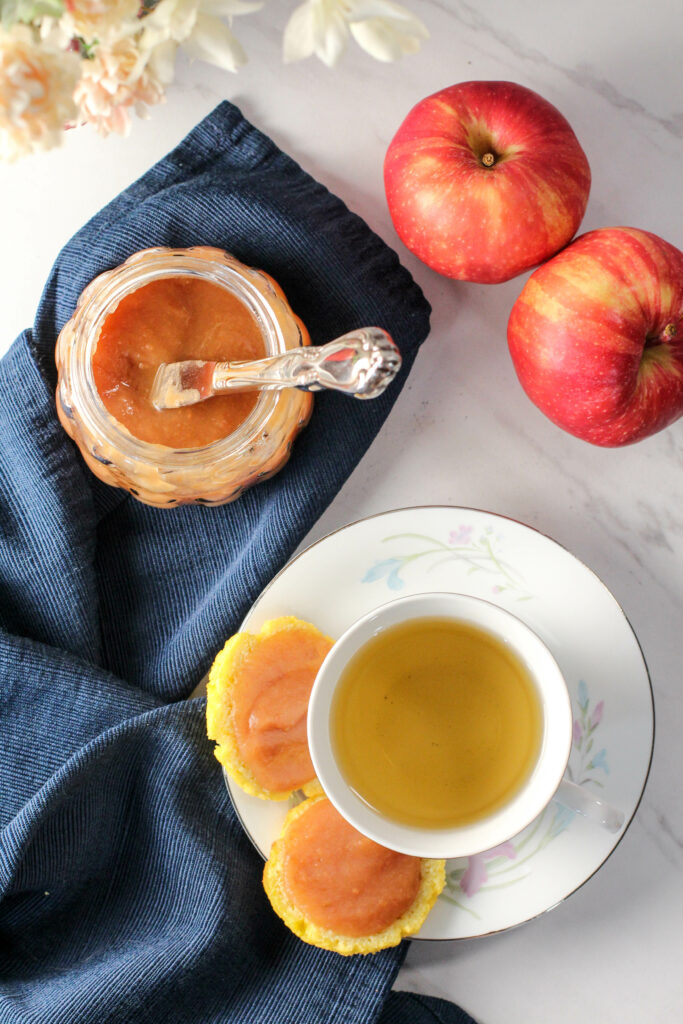
What is Apple Butter Best Served With?
There are so many delicious ways to eat apple butter!
Most people spread apple butter on biscuits or toast, but you can get creative!
Why not spread it on top of pancakes, pumpkin waffles, or French toast?
Or maybe you could try it on top of cheese slices!
You could also mix apple butter into oatmeal.
Apple butter could be used as a dipping sauce, dip chicken tenders or sweet potato fries in it!
Try drizzling it on popcorn!
Or make a cheddar turkey panini and dip your sandwich in it!
You can also get creative and look for recipes that use apple butter within them.
For example, did you know that you can substitute the oil in any baking recipe with applesauce?
Well the same can be said with apple butter – use it to replace the oil in one of your favorite baking recipes!
Good candidates include vanilla cake or muffin recipes.
Apple butter is super versatile, so mix things up and try something new with your apple butter!
Does Apple Butter Go Bad?
Unfortunately it is possible!
But apple butter does have a fairly long shelf life.
This recipe is a little unique in the fact that it is sugar-free and preservative free.
This means that it will not last in the fridge as long as store-bought apple butter, which could be good for up to a year in the fridge once opened.
While much shorter than that, homemade, sugar-free apple butter should keep just fine in the fridge for up to a month.
And use best practices, like don’t dip a licked spoon back into the jar (I know – it’s tempting).
Keep an eye out for off flavors, odors, or a change in appearance which could all indicate that your apple butter is going bad or has already gone bad.
And if mold appears, your apple butter has gone bad and should not be consumed.
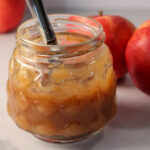
If you are worried about consuming all of it before it goes bad, there are two great ways to preserve it – freezing and canning!

Can Apple Butter be Frozen?
Yes!
This is going to be the easiest way for most folks to save their apple butter.
Let the apple butter cool completely (overnight in the fridge would be a great way to do this).
Once cooled, ladle it into freezer safe jars, leaving a 1/2-inch headspace.
Secure the lid tightly and label the lid, making sure to include the date (I use masking tap to label my lids so that I can keep relabeling the lids).
Alternatively, you could also use a leak proof silicone snack bag, but that could get pretty pricey and I don’t know if you would want to tie up all of your snack bags for months.
Frozen apple butter will taste best if used within a year, but it will be safe to eat indefinitely.
Can Apple Butter be Canned?
Absolutely!
This is what I did this year!
Canning Preparation
The best method is to use a water bath, as it is not recommended that you pressure cook apple butter.
Most pressure canners can still be used for a water bath though!
Just check your manufacturers instructions to determine what modifications might need to be made for a water bath.
On mine, I have to remove the overpressure plug to prevent the pressure canner from building pressure.
So before you start this process, your apple butter should be prepared and hot (or at least reheating).
If you don’t have time to can the apple butter the same day you make it, no worries!
Store it in the fridge until you are ready to can and then reheat it on the stove (make sure to stir frequently to ensure it doesn’t burn to the bottom of the pan).
Fill the the canner half full of water and get it heating.
It is recommended that the water be about 180 degrees for hot pack water baths (which is what we are doing).
I also keep a hot kettle (or pan) of water on hand in case I don’t have enough water over the jars once the canner is filled.
Also grab any tools you might use for filling the jars.
I love my canning kit, from which I used the funnel, measurer/bubble remover, and the jar lifter to can my apple butter!
Now you are ready to start canning!
Preparing and Filling the Jars
First, prepare the jars, lids, and bands by getting them washed up.
I prefer a half pint size for the jars.
Most people recommend running the jars through a sanitize cycle on your dishwasher so that the jars are hot and ready to go.
I’m just never prepared for this, so I place my jars on a baking sheet and bring them to 200 degrees in the oven.
Once the jars are hot (about 10 minutes in the oven or hot out of the dishwasher), ladle the hot apple butter into the jars, leaving a 1/4-inch headspace.
Run a knife or the other end of the jar measurer around the edge of the jar to remove any air bubbles.
Use a wet rag to wipe the rims of the jars clean.
Screw on lids and bands until hand tight (it is not recommended to really crank down the lids with any extra tools).
Processing the Jars
Next, I use my jar lifter to place the jars in the hot water bath.
Once all of the jars are in, check the water level to make sure it is at least 1 inch above the tops of the jars (I use my jar measurer to check the canner water level).
Turn the heat to its highest setting to bring the water to a vigorous boil.
Place the cover on the canner and lower the heat setting to maintain a gentle boil.
For apple butter, process the jars for 10 minutes.
Once the time is up, turn off the heat and remove the canner cover.
Use a jar lifter to remove the jars and place them on a towel or cooling rack.
Usually my jars will seal within 4 hours of removing them from the water bath.
Allow jars to naturally cool for 12-24 hours before labeling and storing in a cool, dark place.
Apple butter should keep for 18 months (with the new SureTight Ball jar lids).
Enjoy this delicious topping year round!
Homemade Apple Butter {keto, paleo, vegan}
- Total Time: 1 hour to 8.5 hours
- Yield: About 8 cups 1x
Description
Did you know that apple butter is actually very easy to make? You have got to try making your own delicious apple butter to enjoy this fall!
Ingredients
Crockpot and StoveTop Ingredients:
- 6 lbs of apples
- 3/4 cup apple cider, apple juice, or water
- 2 Tablespoons apple cider vinegar or lemon juice
- 1 Tablespoon cinnamon
Instant Pot Ingredients:
- 4 lbs of apples
- 1/4 cup apple cider, apple juice, or water
- 2 Tablespoons apple cider vinegar or lemon juice
- 1 Tablespoon cinnamon
Optional Ingredients:
- Additional cinnamon
- 1/2 teaspoon ground nutmeg
- 1/2 teaspoon ground cloves
- 1/4 cup sweetener of choice (or more, to taste)
Instructions
Crockpot Directions:
- Core apples (peel if desired, but you will not notice the skins in the finished product) and cut into quarters and then cut the quarters in half (see picture of my crockpot full of raw apples above). Place in the crockpot with the apple cider and the apple cider vinegar.
- Cook the apples on low for 8 hours.
- Using an immersion blender or working in batches with a regular blender, puree the hot apples.
- Add the cinnamon and taste test. Decide if you would like to add any of the optional ingredients (make the flavor how you want!).
- If the apple butter is too runny, you can either continue to cook the apple butter on low in the crock pot with the lid off, or you can transfer the apple mixture to a pan to cook off some of the liquid on the stove. Heat until the apple butter has reached your desired consistency. If you use the stovetop, stir frequently to make sure the apple butter doesn’t burn to the bottom of the pan.
- Enjoy!
Stovetop Directions:
- Prepare the apples in the same way as the crockpot directions above.
- Put the apples, apple cider, and the apple cider vinegar in a large pot.
- Bring to a boil over medium-high heat and then reduce the heat to low. Cover the pot and allow the apples to simmer until they are soft, about 30 minutes. Stir frequently, checking the liquid level to make sure there is enough liquid so that the apples will not burn to the bottom of the pan. Add additional apple cider if needed.
- Using an immersion blender or working in batches with a regular blender, puree the hot apples.
- Add the cinnamon and taste test. Decide if you would like to add any of the optional ingredients (make the flavor how you want!).
- If the apple butter is too runny, continue to cook it on the stove over low heat until it has reached your desired consistency.
- Enjoy!
Instant Pot Directions:
- Prepare the apples in the same way as the crockpot directions above.
- Put the apples, apple cider, and the apple cider vinegar in the Instant Pot.
- Put on the lid and position the vent valve to the sealing position.
- Set the Instant Pot to cook on High Pressure for 15 minutes.
- If you have time, let the Instant Pot naturally release. If you are in a hurry, let the Instant Pot naturally release for 10 minutes and then do a quick release to let out the remaining pressure.
- Using an immersion blender or working in batches with a regular blender, puree the hot apples.
- Add the cinnamon and taste test. Decide if you would like to add any of the optional ingredients (make the flavor how you want!).
- If the apple butter is too runny, select Sauté on the Instant Pot and simmer the apple butter until it has reached your desired consistency. Stir frequently to make sure the apple butter doesn’t burn to the bottom of the pan.
- Enjoy!
Notes
Storage: Store in an airtight container in the fridge for up to a month.
Freezing: Apple butter can easily be frozen! Store in freezer safe containers for up to a year for best freshness, although it will be safe to eat indefinitely.
Canning: Apple butter is a great recipe to can! Ladle hot apple butter into sterilized jars, leaving 1/4 inch headspace. Remove air bubbles and wipe jar rims clean with a rag. Tighten lids on with a screw band. Process in a water bath for 10 minutes. Store canned apple butter in a cool, dark place for up to 18 months.
- Prep Time: 30 minutes
- Cook Time: 30 minutes to 8 hours


Kathy
March 5, 2022 at 2:37 pmAny idea of the carb count. I couldn’t find it anywhere on your post
Monster Cookie • Post Author •
March 6, 2022 at 3:07 pmHi Kathy! I have had a hard time deciding if I should include nutritional information on recipes since there are so many variables. This recipe, for example, will have different carb counts depending on what kind of apples you use. I’ve been plugging my recipes into the verywellfit recipe nutrition analyzer. The recipe makes 8 cups so let’s say that’s 32 servings (that’s 1/4 cup per serving which is a pretty substantial amount!) and if you use the 6 pounds of apples with water, ACV, and cinnamon, the recipe analyzer says the carbs per serving is 5.8g with 1g fiber. We only use about 1 Tablespoon of apple butter on a keto biscuit (or on pancakes!) which is 1.5g of carbs. I hope that helps! Let me know if you have any more questions!